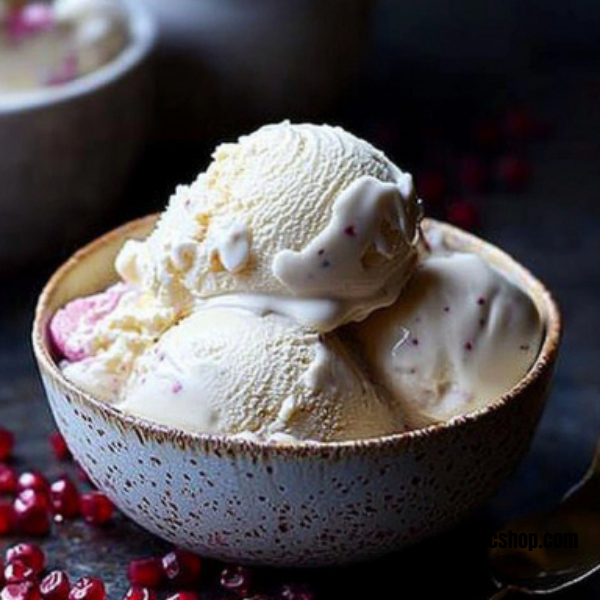
Ah, the joy of homemade ice cream! There’s something delightful about creating a sweet, creamy treat right in your own kitchen, especially during warm summer days. With just a few basic ingredients—milk, cream, sugar, and a touch of vanilla—you can craft a delectable dessert that’s sure to impress family and friends. What’s more, this recipe promises all the fun without the fuss of complicated machines or intricate steps!
Imagine taking a scoop of that freshly made ice cream, the smooth and creamy texture melting in your mouth with each heavenly bite. You can customize it with your favorite flavors, like chocolate or strawberry, or even add mix-ins such as nuts and chocolate chips. Homemade ice cream allows you to explore your creativity and satisfy your cravings in a way store-bought treats simply cannot compete with.
Perhaps the best part is the satisfaction that comes from making it yourself. There’s a special warmth in knowing you’ve lovingly prepared something so enjoyable. Plus, the thrill of whisking through the freezing mixture, watching it transform into a soft, silky delight, is an experience worth sharing! So, grab your ingredients and let’s get ready to embark on a delicious ice cream adventure together.
How to Make Homemade Ice Cream Without a Machine
Ingredients:
1 1⁄2 cups milk
1 1⁄2 cups heavy cream
2⁄3 cup sugar
1 tablespoon vanilla extract
1⁄8 teaspoon kosher salt
Directions:
In a mixing bowl, combine the milk, heavy cream, sugar, vanilla extract, and kosher salt. Stir until the sugar is completely dissolved and the mixture is well combined.
Pour the ice cream mixture into an 8-10 inch square baking pan, spreading it out evenly.
Place the pan in the freezer for 90 minutes to begin the freezing process. After 90 minutes, remove the pan from the freezer and use a whisk to vigorously stir the mixture, breaking up any frozen chunks and scraping the sides of the pan.
Return the pan to the freezer and continue freezing. Check the mixture after 45 minutes and repeat the whisking process, making sure to scrape the sides of the pan well.
Continue to check and whisk the mixture every 30 minutes for the next couple of hours.
After 3-4 hours of freezing and whisking, the ice cream should reach a soft-serve consistency. You can continue to freeze it for a firmer texture or enjoy it right away as a creamy treat.
Serve the homemade ice cream scooped into bowls or cones, and top with your favorite toppings if desired. Enjoy the rich and creamy flavor of freshly made ice cream!
How to Serve Homemade Ice Cream
Serving up your homemade ice cream can be as creative as making it! Gather your family and friends around a festive table where you can showcase your delightful creation. Use colorful bowls or classic ice cream cones to add a cheerful touch when presenting your sweet treat. Don’t shy away from adding a flair; a scoop of ice cream topped with a vibrant cherry or a sprinkle of nuts can make the experience even more special.
Consider setting up an ice cream bar with a variety of toppings. Offer choices like chocolate syrup, fresh fruits, crushed cookies, or even sprinkles. Let everyone dive into their own unique combinations! It’s not only a treat but also a fun activity that brings people together. The laughter and joy of sharing your creamery dreams will fill the air, making it a truly delightful occasion.
Lastly, if you have any leftovers (though that’s rare!), store them in an airtight container in the freezer. This way, you can revisit your delectable creation whenever the craving strikes. Just remember to let it sit out for a few minutes before serving to soften it up a bit—because there’s nothing quite like digging into a bowl of freshly made ice cream!
Additional Tips:
Feel free to experiment with flavors! You can add fruit purees, cocoa powder, or even crushed candies to your base mixture.
The more you whisk, the creamier your ice cream will be. Don’t skip this step, as it helps incorporate air for a fluffy texture.
For especially rich ice cream, consider using more cream than milk.
Nutrition Facts:
(Nutrition facts will vary based on serving size and any additional ingredients added.)
FAQ Section
Q: Can I make this ice cream dairy-free?
A: Absolutely! You can substitute the milk and heavy cream with coconut milk or almond milk.
Q: How long will this ice cream last in the freezer?
A: It’s best enjoyed within 1-2 weeks, but it can last for about a month if stored properly.
Q: Can I make larger batches?
A: Yes, just keep the ratios the same, and use a larger baking dish if needed.
Homemade Ice Cream Without a Machine
So, there you have it—a delightful and simple recipe for homemade ice cream without a machine! Dive into this delicious project and enjoy every creamy bite. Happy ice creaming!
Print
Homemade Ice Cream Without a Machine
Ingredients
1 1⁄2 cups milk
1 1⁄2 cups heavy cream
2⁄3 cup sugar
1 tablespoon vanilla extract
1⁄8 teaspoon kosher salt
Instructions
In a mixing bowl, combine the milk, heavy cream, sugar, vanilla extract, and kosher salt. Stir until the sugar is completely dissolved and the mixture is well combined.
Pour the ice cream mixture into an 8-10 inch square baking pan, spreading it out evenly.
Place the pan in the freezer for 90 minutes to begin the freezing process. After 90 minutes, remove the pan from the freezer and use a whisk to vigorously stir the mixture, breaking up any frozen chunks and scraping the sides of the pan.
Return the pan to the freezer and continue freezing. Check the mixture after 45 minutes and repeat the whisking process, making sure to scrape the sides of the pan well.
Continue to check and whisk the mixture every 30 minutes for the next couple of hours.
After 3-4 hours of freezing and whisking, the ice cream should reach a soft-serve consistency. You can continue to freeze it for a firmer texture or enjoy it right away as a creamy treat.
Serve the homemade ice cream scooped into bowls or cones, and top with your favorite toppings if desired. Enjoy the rich and creamy flavor of freshly made ice cream!


Leave a Comment