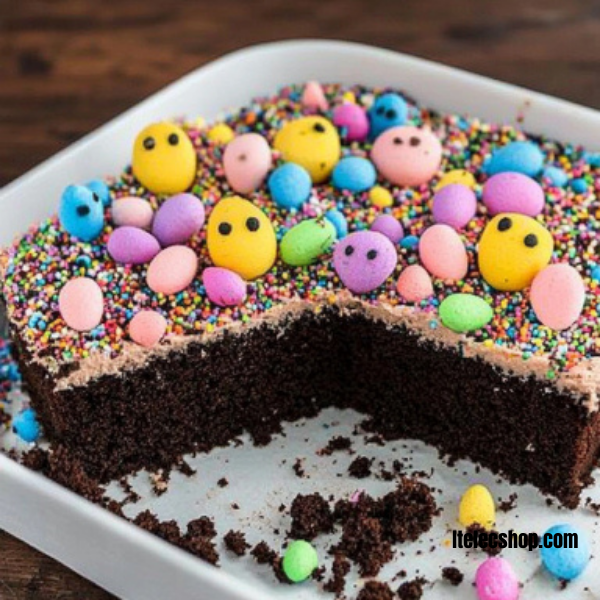
Ah, the Easter Dirt Cake! It’s not just any dessert; it’s a delightful, whimsical creation that transports you straight to the heart of spring. This dessert is perfect for any festive gathering, particularly during Easter, when families come together to celebrate. The blend of chocolate, creamy textures, and playful decorations makes it a favorite among both young and old alike. It’s a treat that brings smiles, laughter, and a dash of nostalgia.
Creating this cake is also a wonderful opportunity to involve your kids in the kitchen. They can help crush the Oreos and decorate the cake, making it not only a delightful dessert but also a cherished family activity. It’s a fantastic way to teach them about cooking while having fun. Plus, who wouldn’t want to get their hands dirty with some delicious chocolate?
Lastly, the beauty of this recipe lies in its simplicity. You don’t need to be a master chef to create something spectacular. With just a handful of ingredients and some easy steps, you can whip up this crowd-pleasing delight in no time. So gather your loved ones, and let’s dive into the joys of making an Easter Dirt Cake!
How to Make Easter Dirt Cake
Ingredients:
1 package (36 cookies) Oreo cookies, crushed
2 packages (3.9 ounces each) instant chocolate pudding mix
4 cups cold milk
8 ounces cream cheese, softened
1/4 cup unsalted butter, softened
1 cup powdered sugar
12 ounces whipped topping (e.g., Cool Whip), thawed
Candy-coated chocolate eggs for decoration
Gummy worms for decoration
Directions:
Prepare the Oreo Layer: Begin by crushing the Oreo cookies into fine crumbs. You can use a food processor or simply put them in a plastic bag and roll over them with a rolling pin until they’re finely crushed. Set those delightful crumbs aside for later.
Mix the Pudding Layer: In a large mixing bowl, whisk together the instant chocolate pudding mix and cold milk. Blend until the mixture is smooth and cohesive. Once you have a lovely consistency, let it sit for a few moments to thicken up.
Create the Cream Cheese Mixture: In another bowl, beat the softened cream cheese, unsalted butter, and powdered sugar together using an electric mixer. Mix until everything is smooth and creamy. Now, gently fold in the thawed whipped topping. This mixture will add a lovely lightness to your dirt cake.
Layer the Cake: It’s time to assemble this delightful dessert! In your chosen serving dish, start by adding a layer of crushed Oreos. Next, add a layer of the cream cheese mixture, followed by a layer of the pudding. Repeat the layers until you’ve used everything, finishing with a generous layer of crushed Oreos on top.
Chill: Cover the cake with plastic wrap and refrigerate it for at least 1 hour. This chilling time allows the layers to set beautifully together.
Decorate: Just before serving, let your creativity shine. Sprinkle the top with candy-coated chocolate eggs and place gummy worms over the edges. This playful decoration truly captures the spirit of Easter!
How to Serve Easter Dirt Cake
Serving your Easter Dirt Cake is as delightful as making it. Once you’ve chilled the cake, it’s a good idea to slice it into generous portions. Using a spatula, serve it on a plate, ensuring each serving gets a taste of those irresistible layers. The combination of chocolate and cream makes for a creamy, satisfying finish to any meal.
To enhance the experience, consider pairing your cake with a scoop of vanilla ice cream. The cool, creamy ice cream contrasts beautifully with the rich chocolate flavors of the cake. This little addition elevates your dessert to new heights and adds a delightful touch.
Finally, ensure everyone knows it’s a communal affair! Encourage your guests to dive right in. After all, this cake is meant to be enjoyed together, with laughter and joy shared around the table. The vibrant decorations and rich flavors are sure to spark conversations and create wonderful memories!
Additional Tips:
- If you prefer a more intense chocolate flavor, consider using chocolate sandwich cookies instead of regular Oreos.
- Don’t hesitate to get creative with decorations! Use different candies to reflect your personal style or seasonal themes.
- Leftovers can be stored in the fridge for up to four days, but we doubt there will be any left!
Nutrition Facts:
Each serving of this Easter Dirt Cake contains approximately:
Calories: 400
Total Fat: 22g
Saturated Fat: 11g
Cholesterol: 30mg
Sodium: 300mg
Total Carbohydrates: 47g
Dietary Fiber: 1g
Sugars: 26g
Protein: 4g
FAQ Section
1. Can I make this cake ahead of time?
Absolutely! This cake can be made a day in advance. Just keep it covered in the refrigerator until you are ready to serve.
2. Can I substitute the cream cheese?
Yes, if you prefer a lighter version, you can substitute the cream cheese with a whipped cream cheese alternative or yogurt.
3. What can I use instead of Cool Whip?
You can use real whipped cream if you prefer. Just whip the cream until it forms soft peaks and gently fold it in as you would the Cool Whip.
Easter Dirt Cake
There you have it, my dears! The magnificent and playful Easter Dirt Cake, ready to bring joy and sweetness into your celebrations. Happy baking!
Print
Easter Dirt Cake
Ingredients
1 package (36 cookies) Oreo cookies, crushed
2 packages (3.9 ounces each) instant chocolate pudding mix
4 cups cold milk
8 ounces cream cheese, softened
1/4 cup unsalted butter, softened
1 cup powdered sugar
12 ounces whipped topping (e.g., Cool Whip), thawed
Candy-coated chocolate eggs for decoration
Gummy worms for decoration
Instructions
Serving your Easter Dirt Cake is as delightful as making it. Once you’ve chilled the cake, it’s a good idea to slice it into generous portions. Using a spatula, serve it on a plate, ensuring each serving gets a taste of those irresistible layers. The combination of chocolate and cream makes for a creamy, satisfying finish to any meal.
To enhance the experience, consider pairing your cake with a scoop of vanilla ice cream. The cool, creamy ice cream contrasts beautifully with the rich chocolate flavors of the cake. This little addition elevates your dessert to new heights and adds a delightful touch.
Finally, ensure everyone knows it’s a communal affair! Encourage your guests to dive right in. After all, this cake is meant to be enjoyed together, with laughter and joy shared around the table. The vibrant decorations and rich flavors are sure to spark conversations and create wonderful memories!





Leave a Comment